Access the Manage delivery plans page.
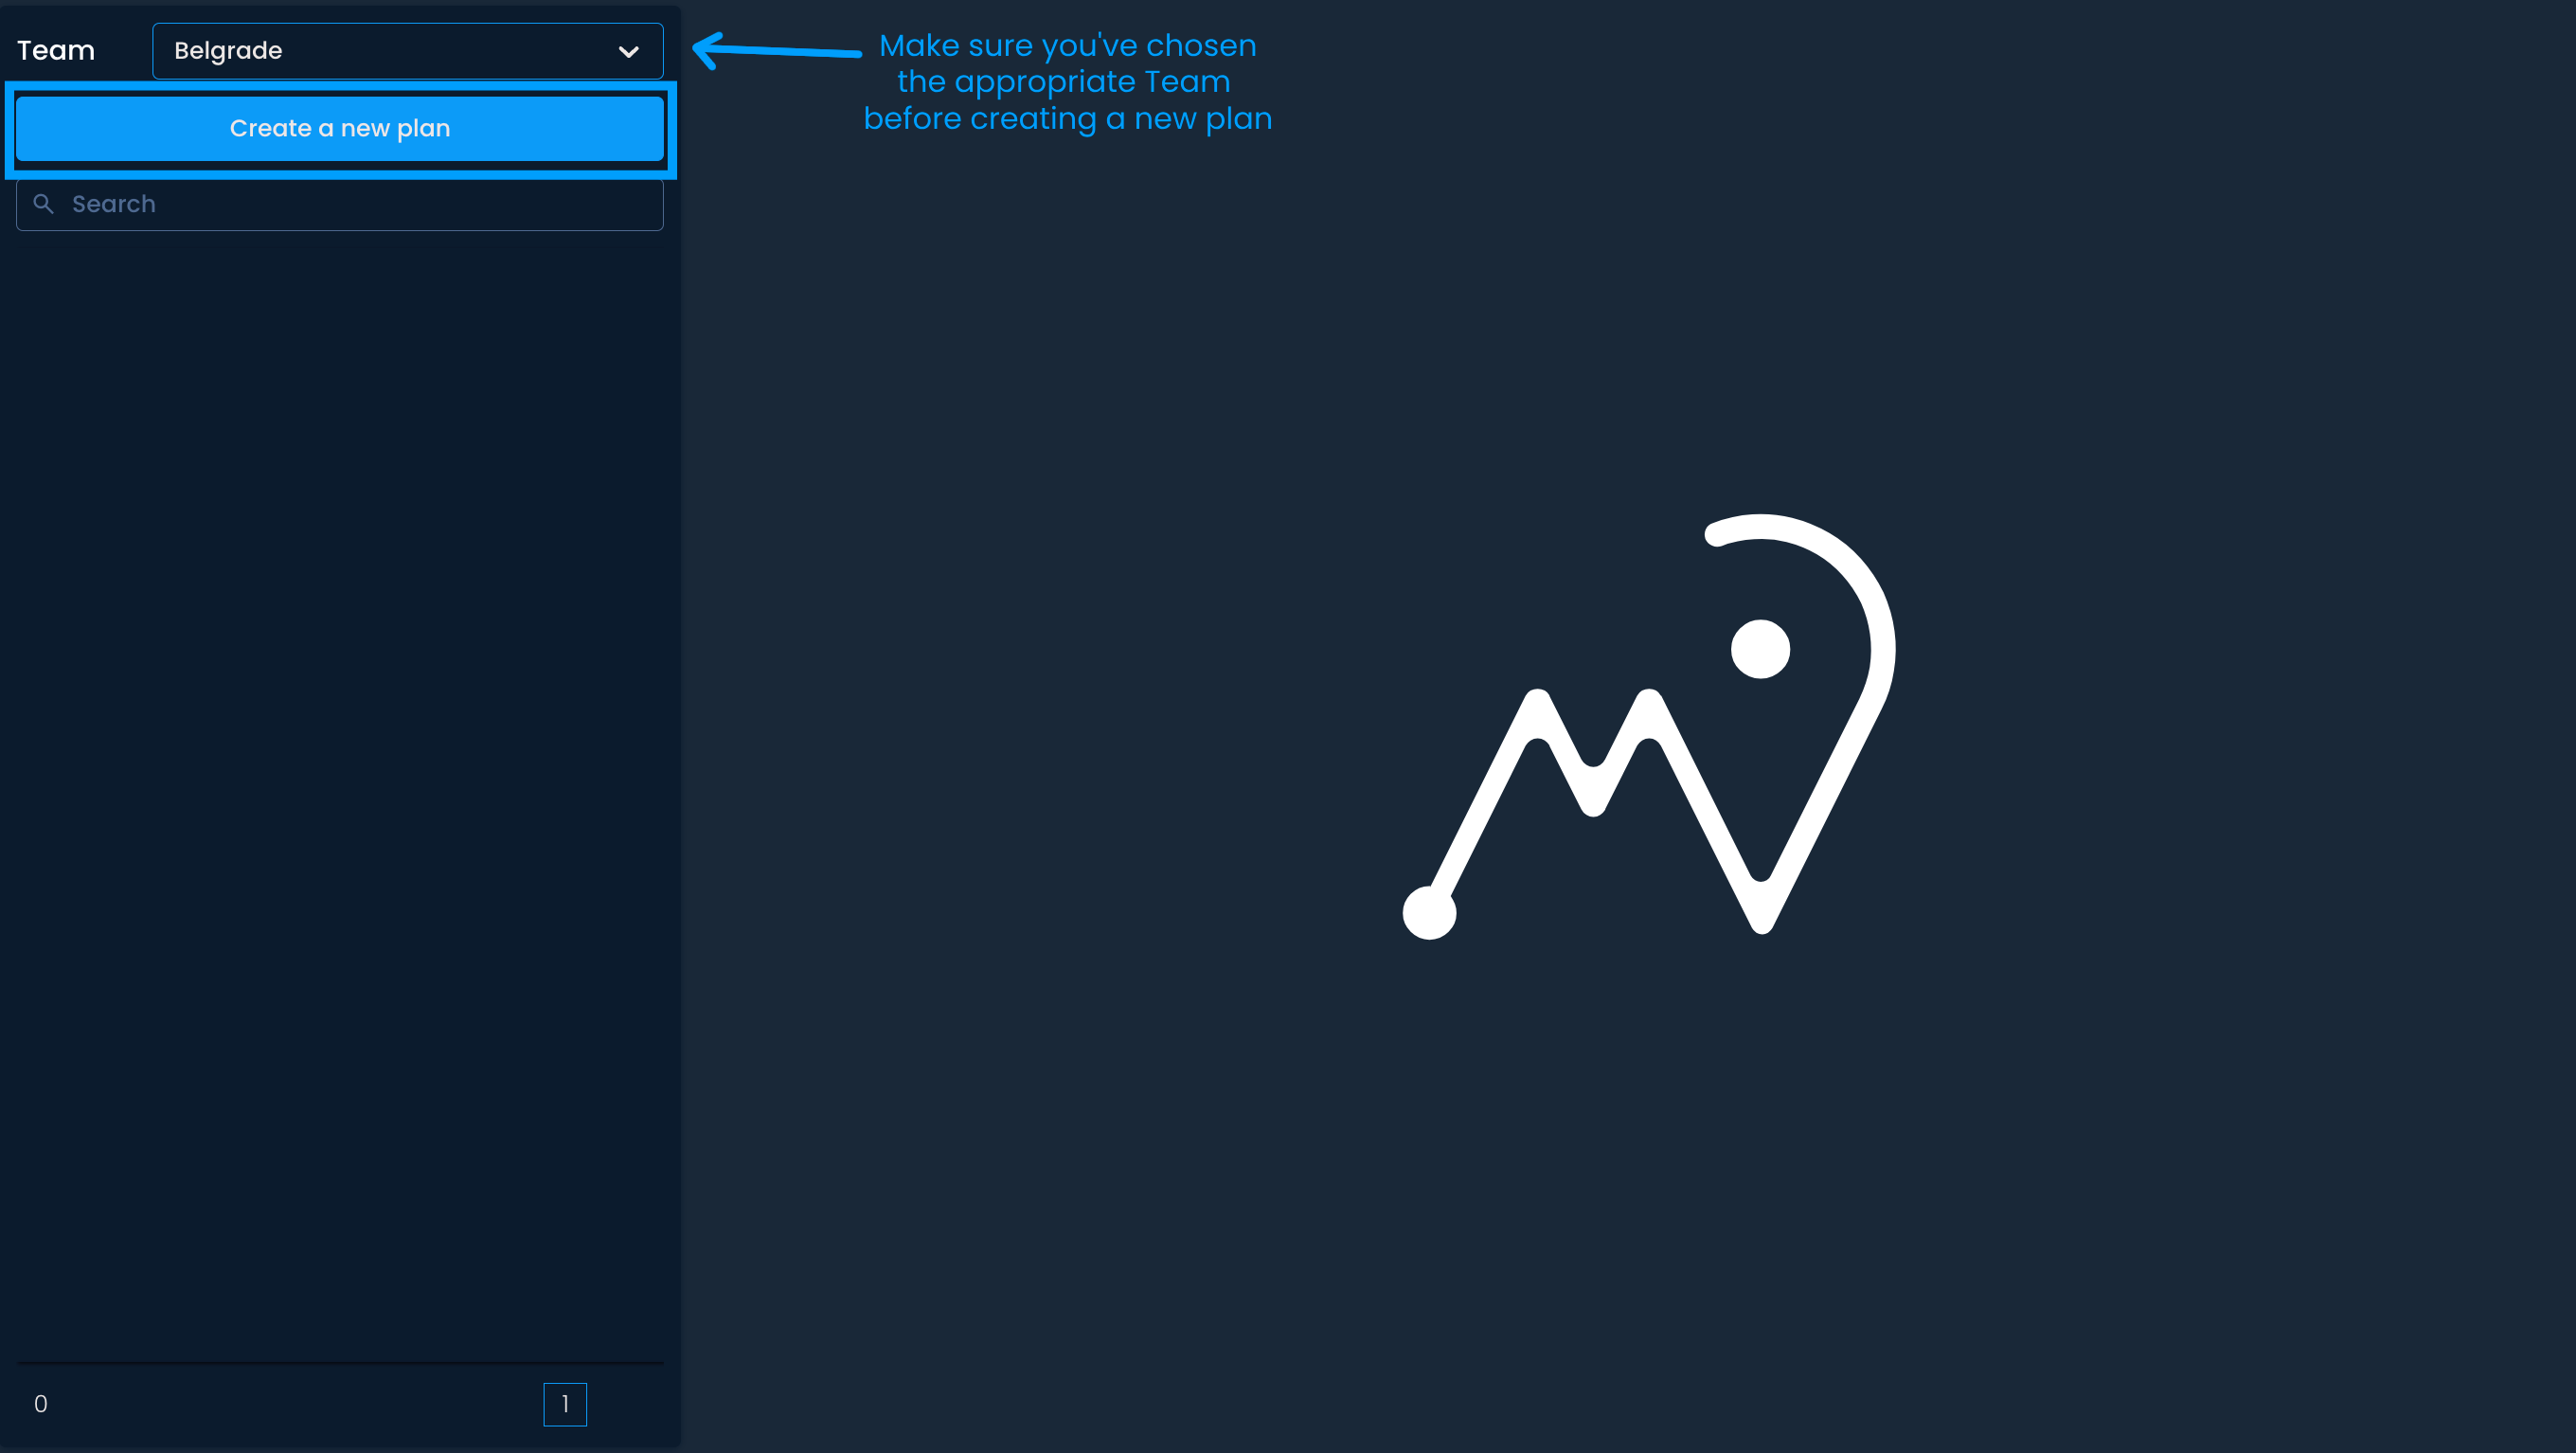
From the drop-down menu, select a team for which you wish to create delivery plans. Then, click Create a new plan.
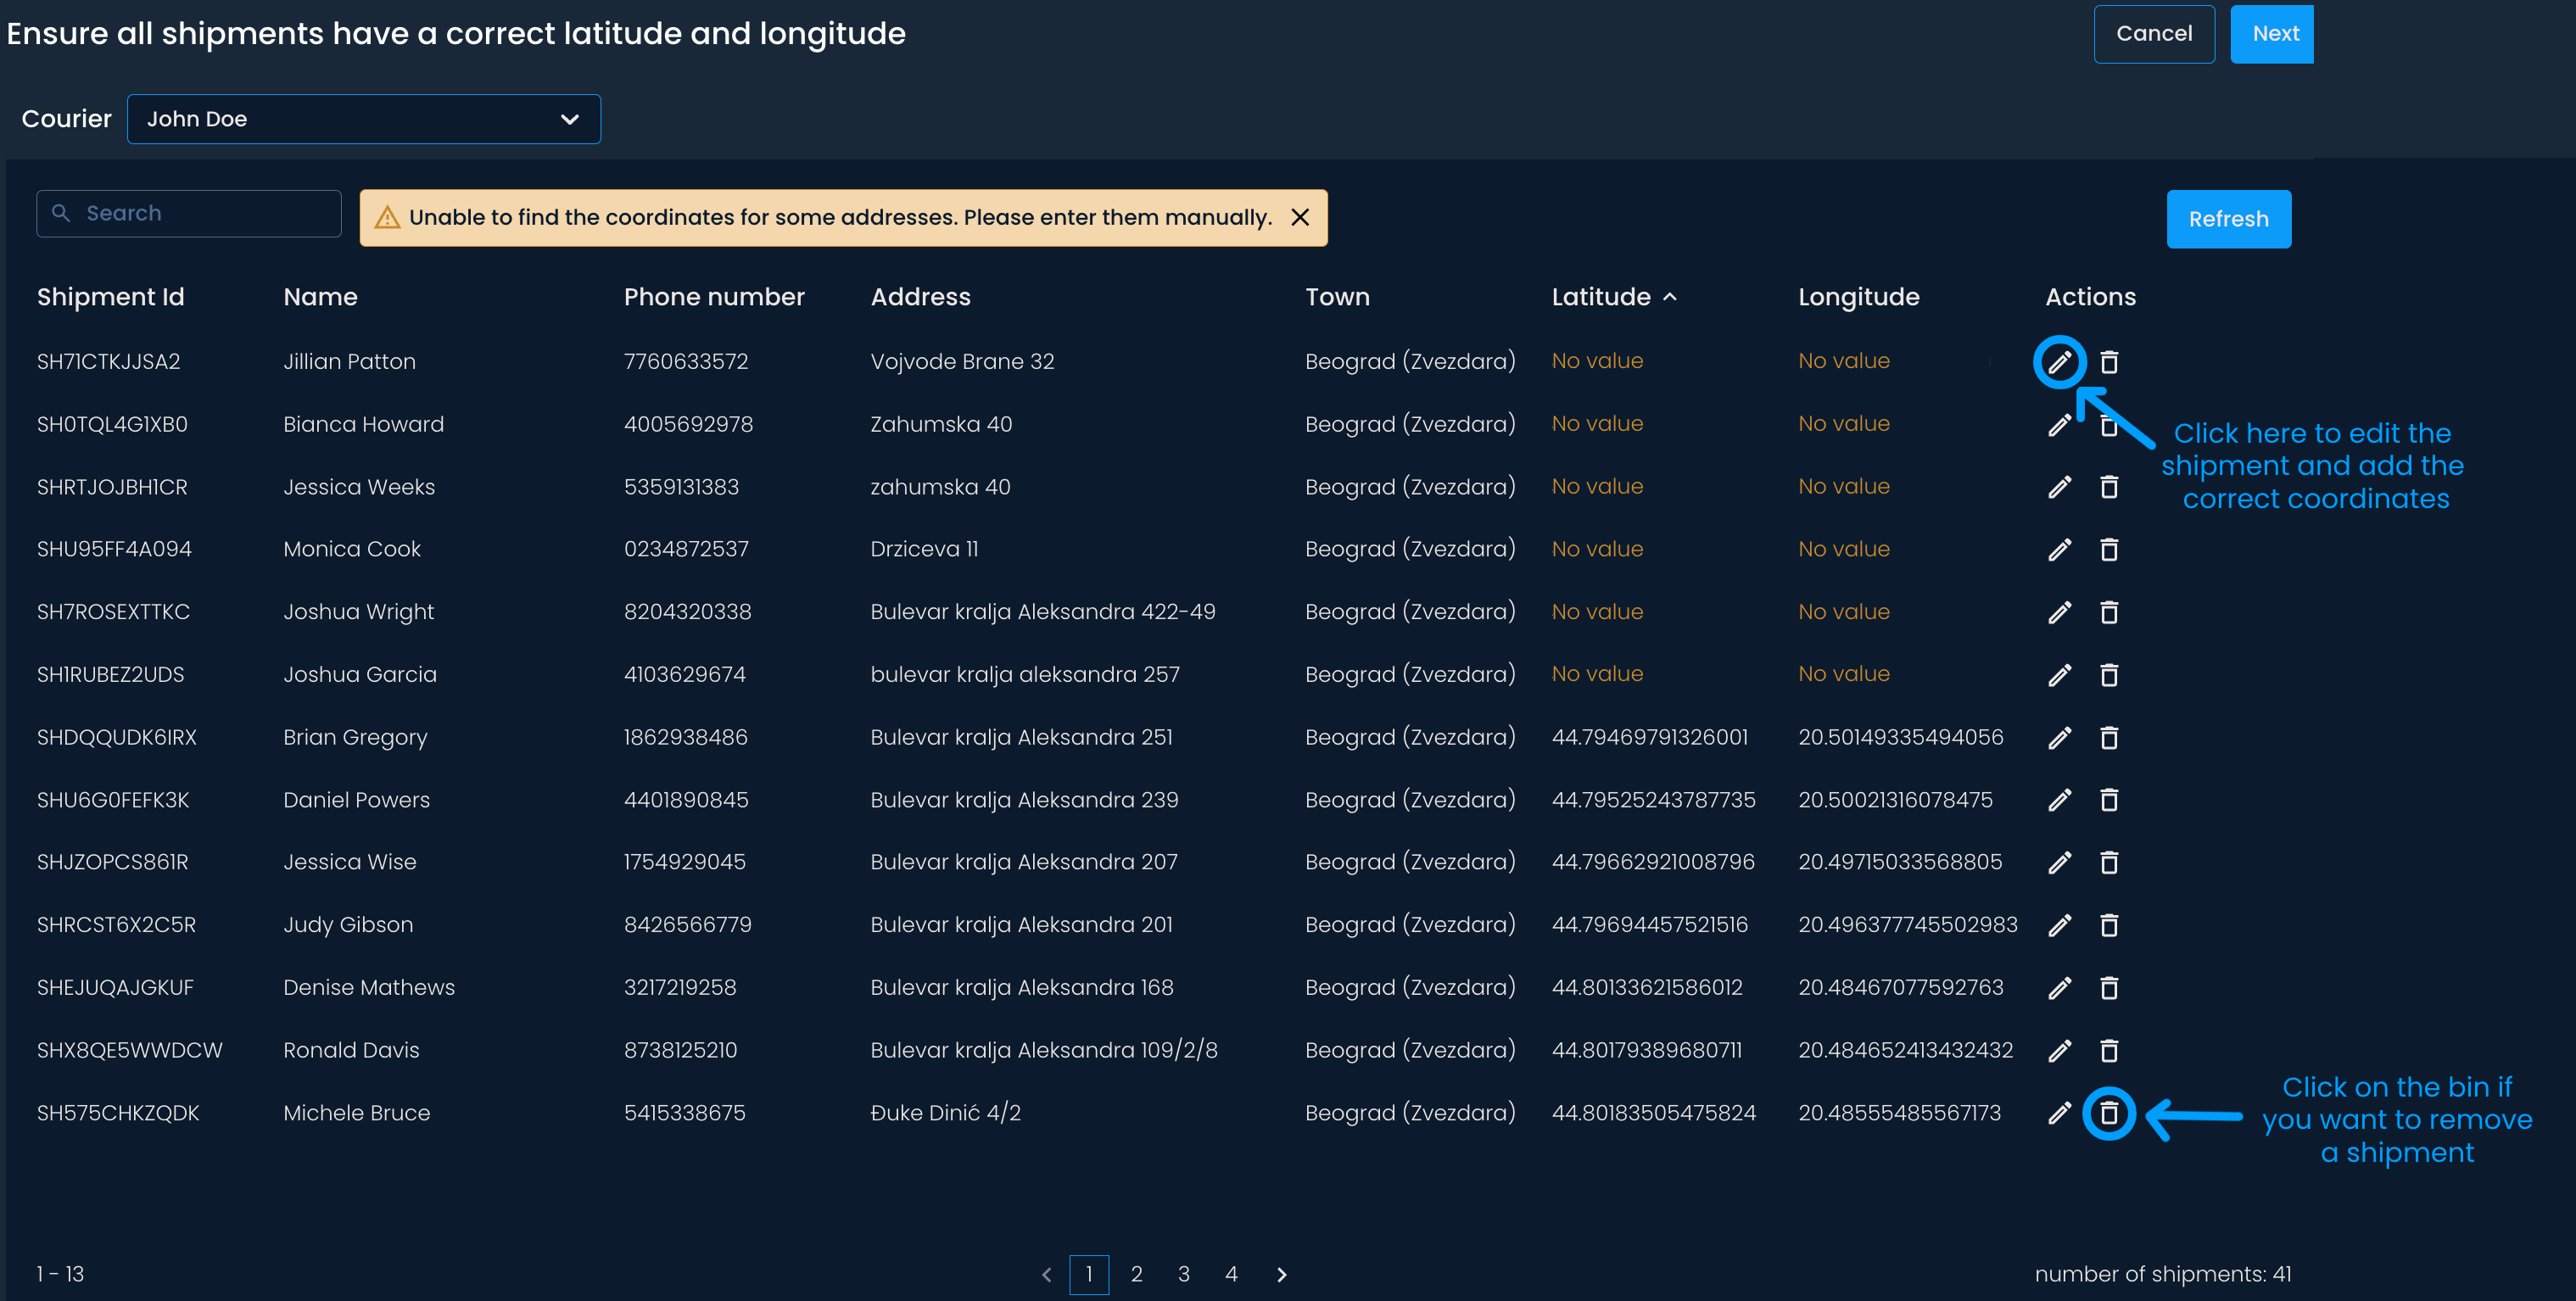
You can select a courier by entering their name or choosing them from the drop-down list to view their assigned shipments.
Click the bin icon to remove any shipments accidentally assigned to the courier. Removed shipments will be excluded from the plan.
If addresses are incomplete, such as missing coordinates, you will see 'No value' in the Latitude and Longitude column. In that case, you will need to add the coordinates manually. Click the pencil icon in the Actions column, paste the coordinates, and press Save.

Once you’re sure all shipments are in the list and with the correct coordinates, click Next.
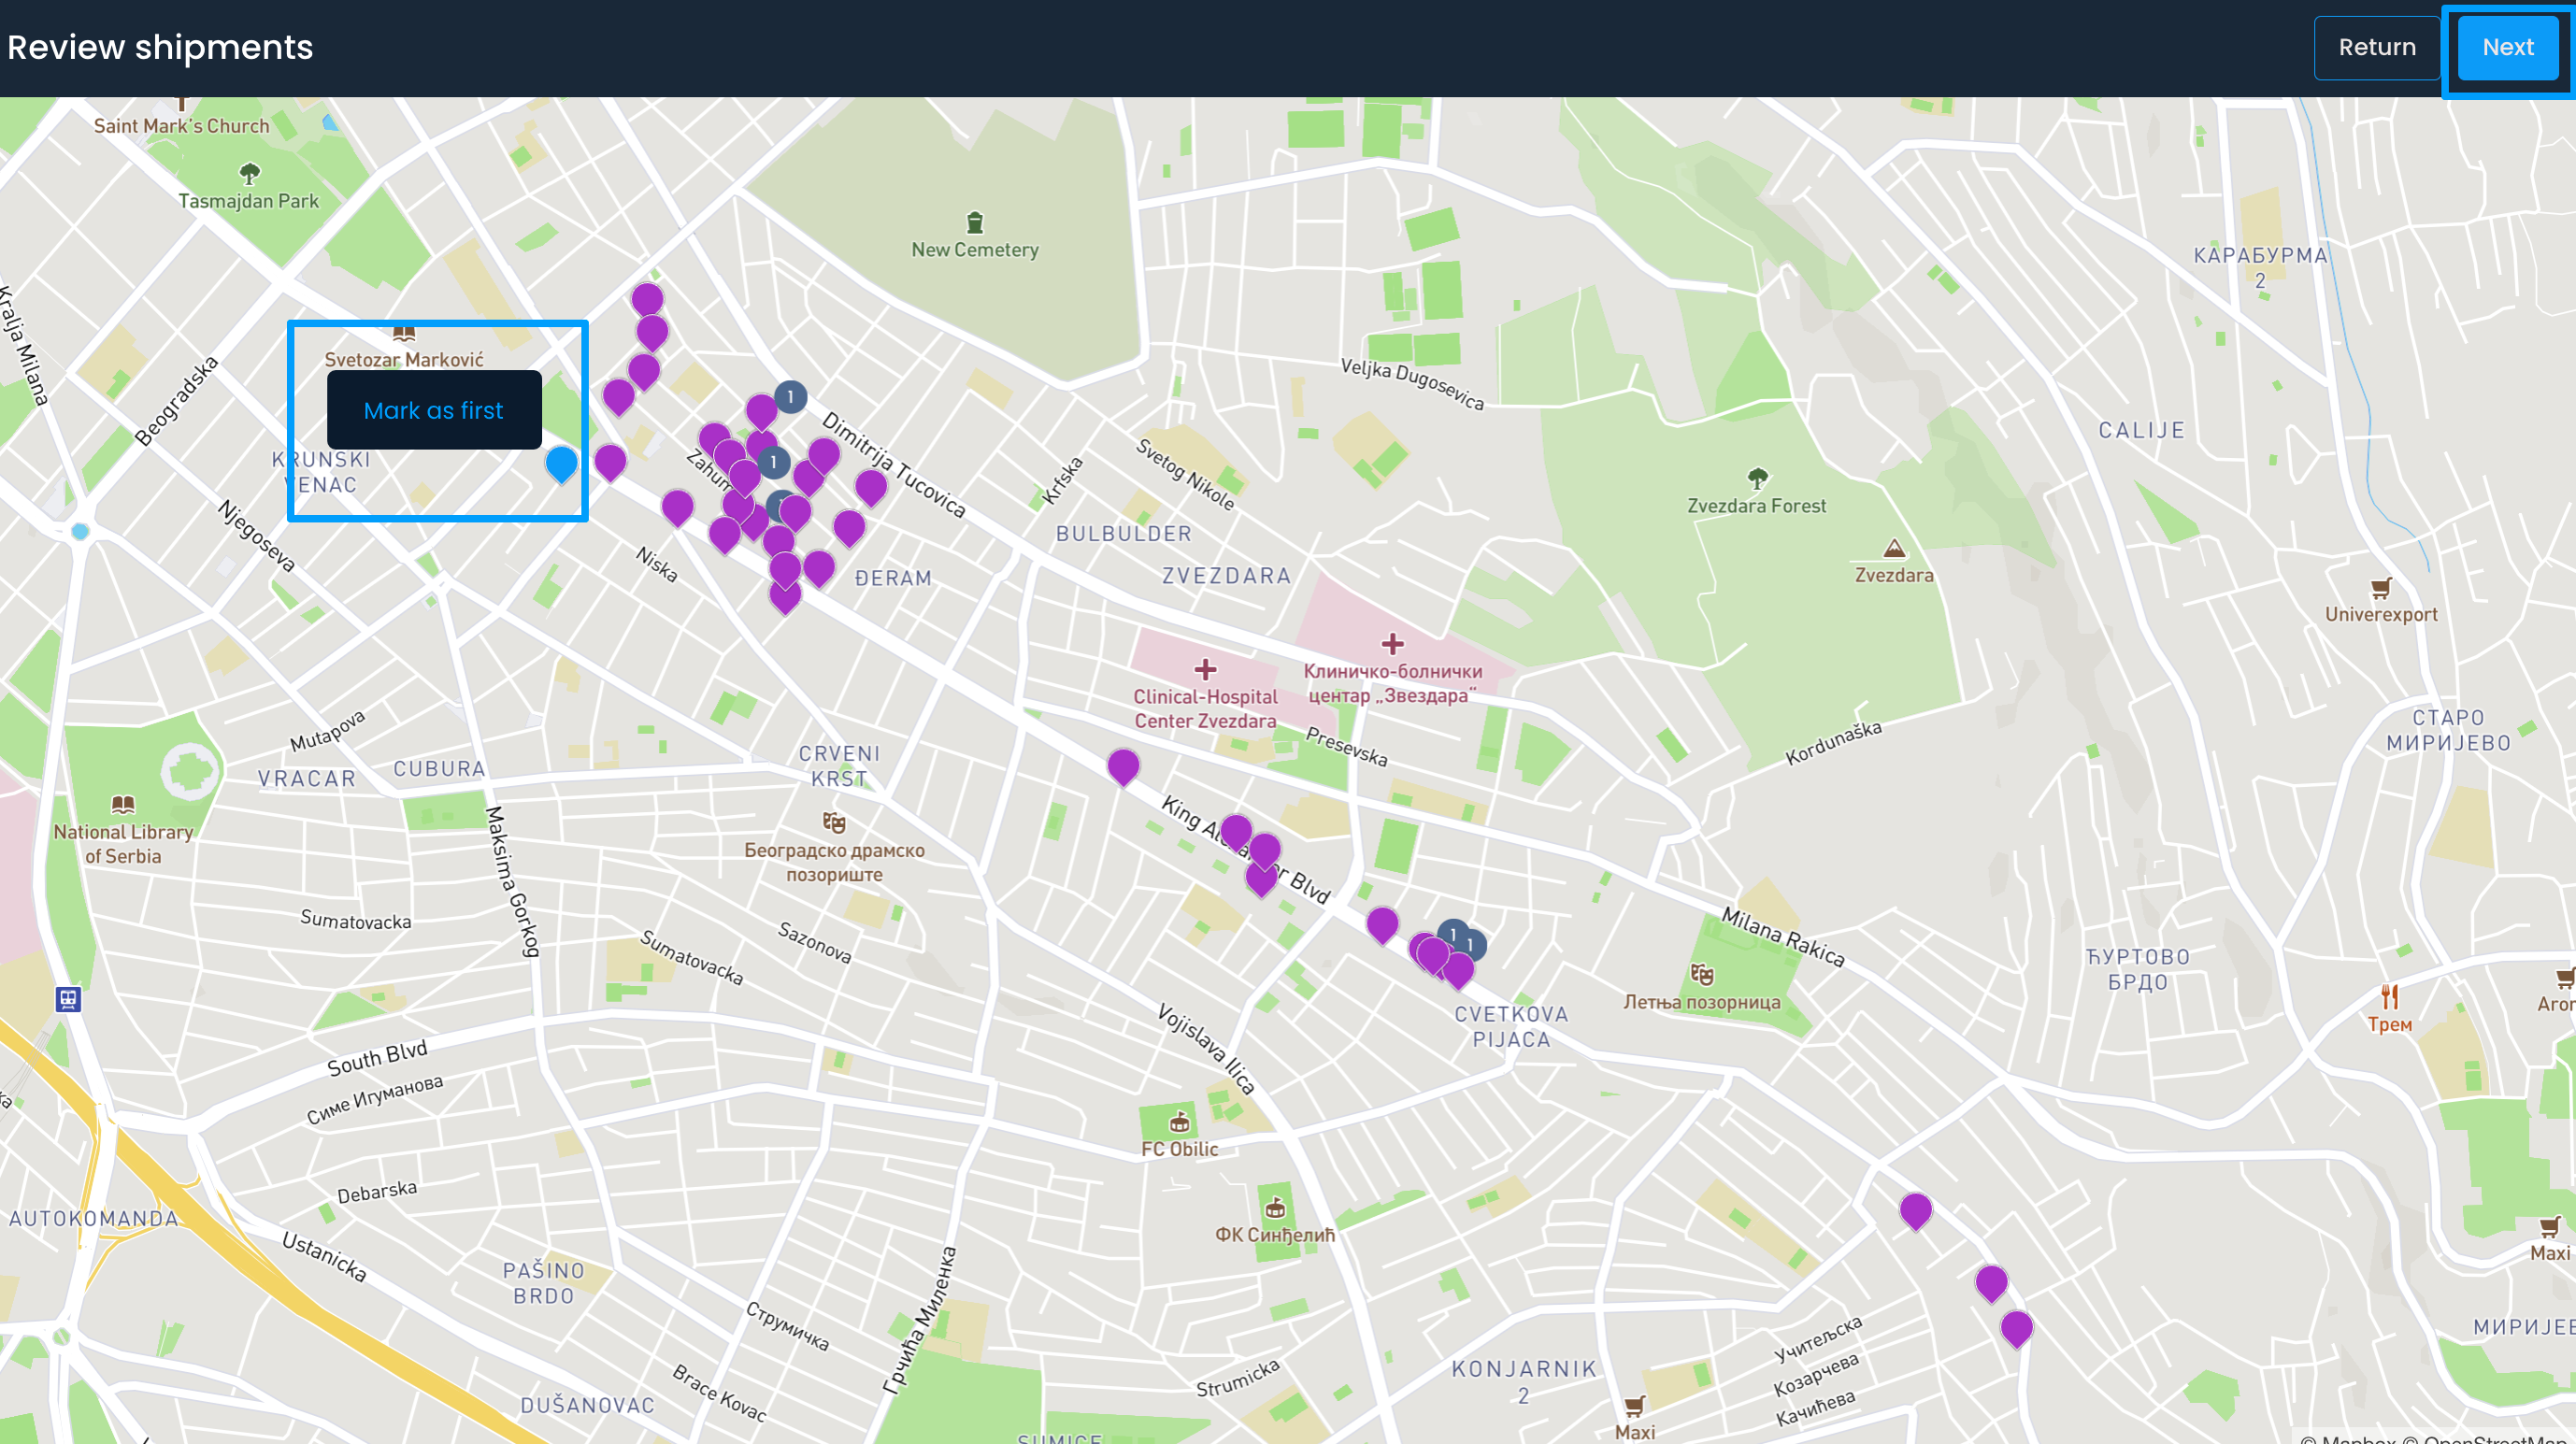
The assigned shipments will be displayed on a map in the next step. You can review them to ensure there are no deviations. Optionally, you can choose the first shipment for delivery by right-clicking on it and selecting Mark as first. Once satisfied, click Next.
When you set the hub and departure time, you’ll see the proposed route on the map and the planned distance and driving time in the top-right corner. Click Done.
You will need to repeat this process for other couriers.
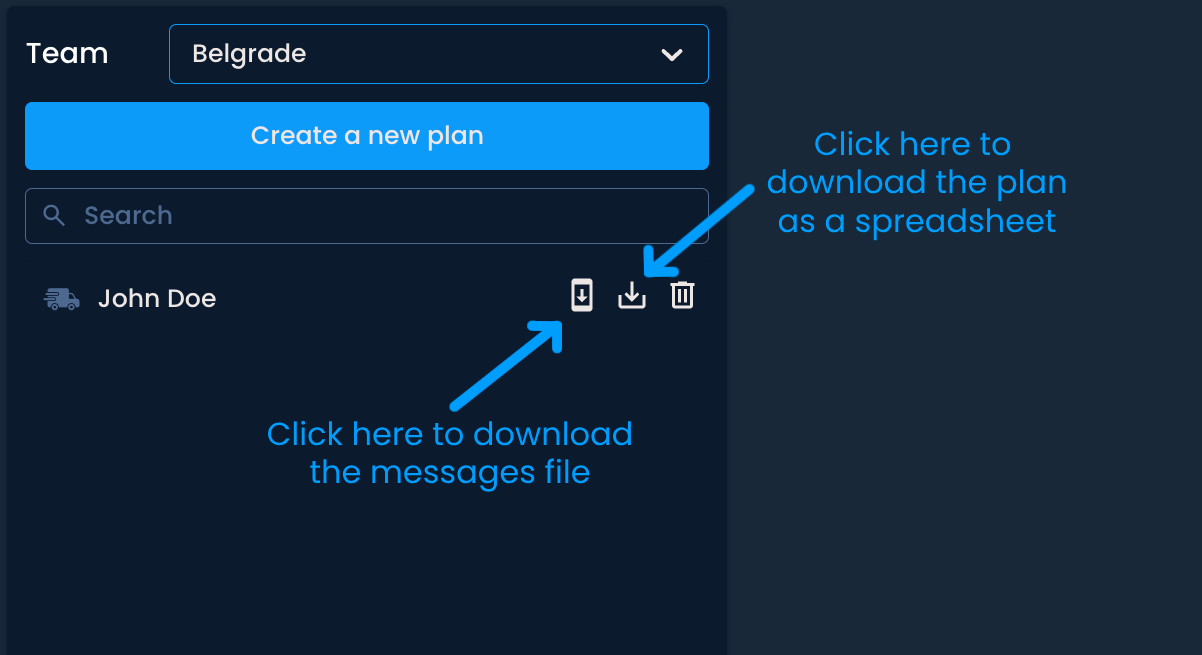
The plan that you create will appear in the list. To download the plan, click on the button next to the bin icon. The spreadsheet will include the shipment code, recipient's name and phone number, delivery address, delivery sequence, and expected delivery time window.
If you wish to notify recipients of the time windows in which they can expect their parcels to be delivered, you can download a file with predefined messages by clicking the first icon in the row. Then, you can send the messages using your preferred communication tools.