Zones are groups of delivery areas, teams, and hubs that users can access.
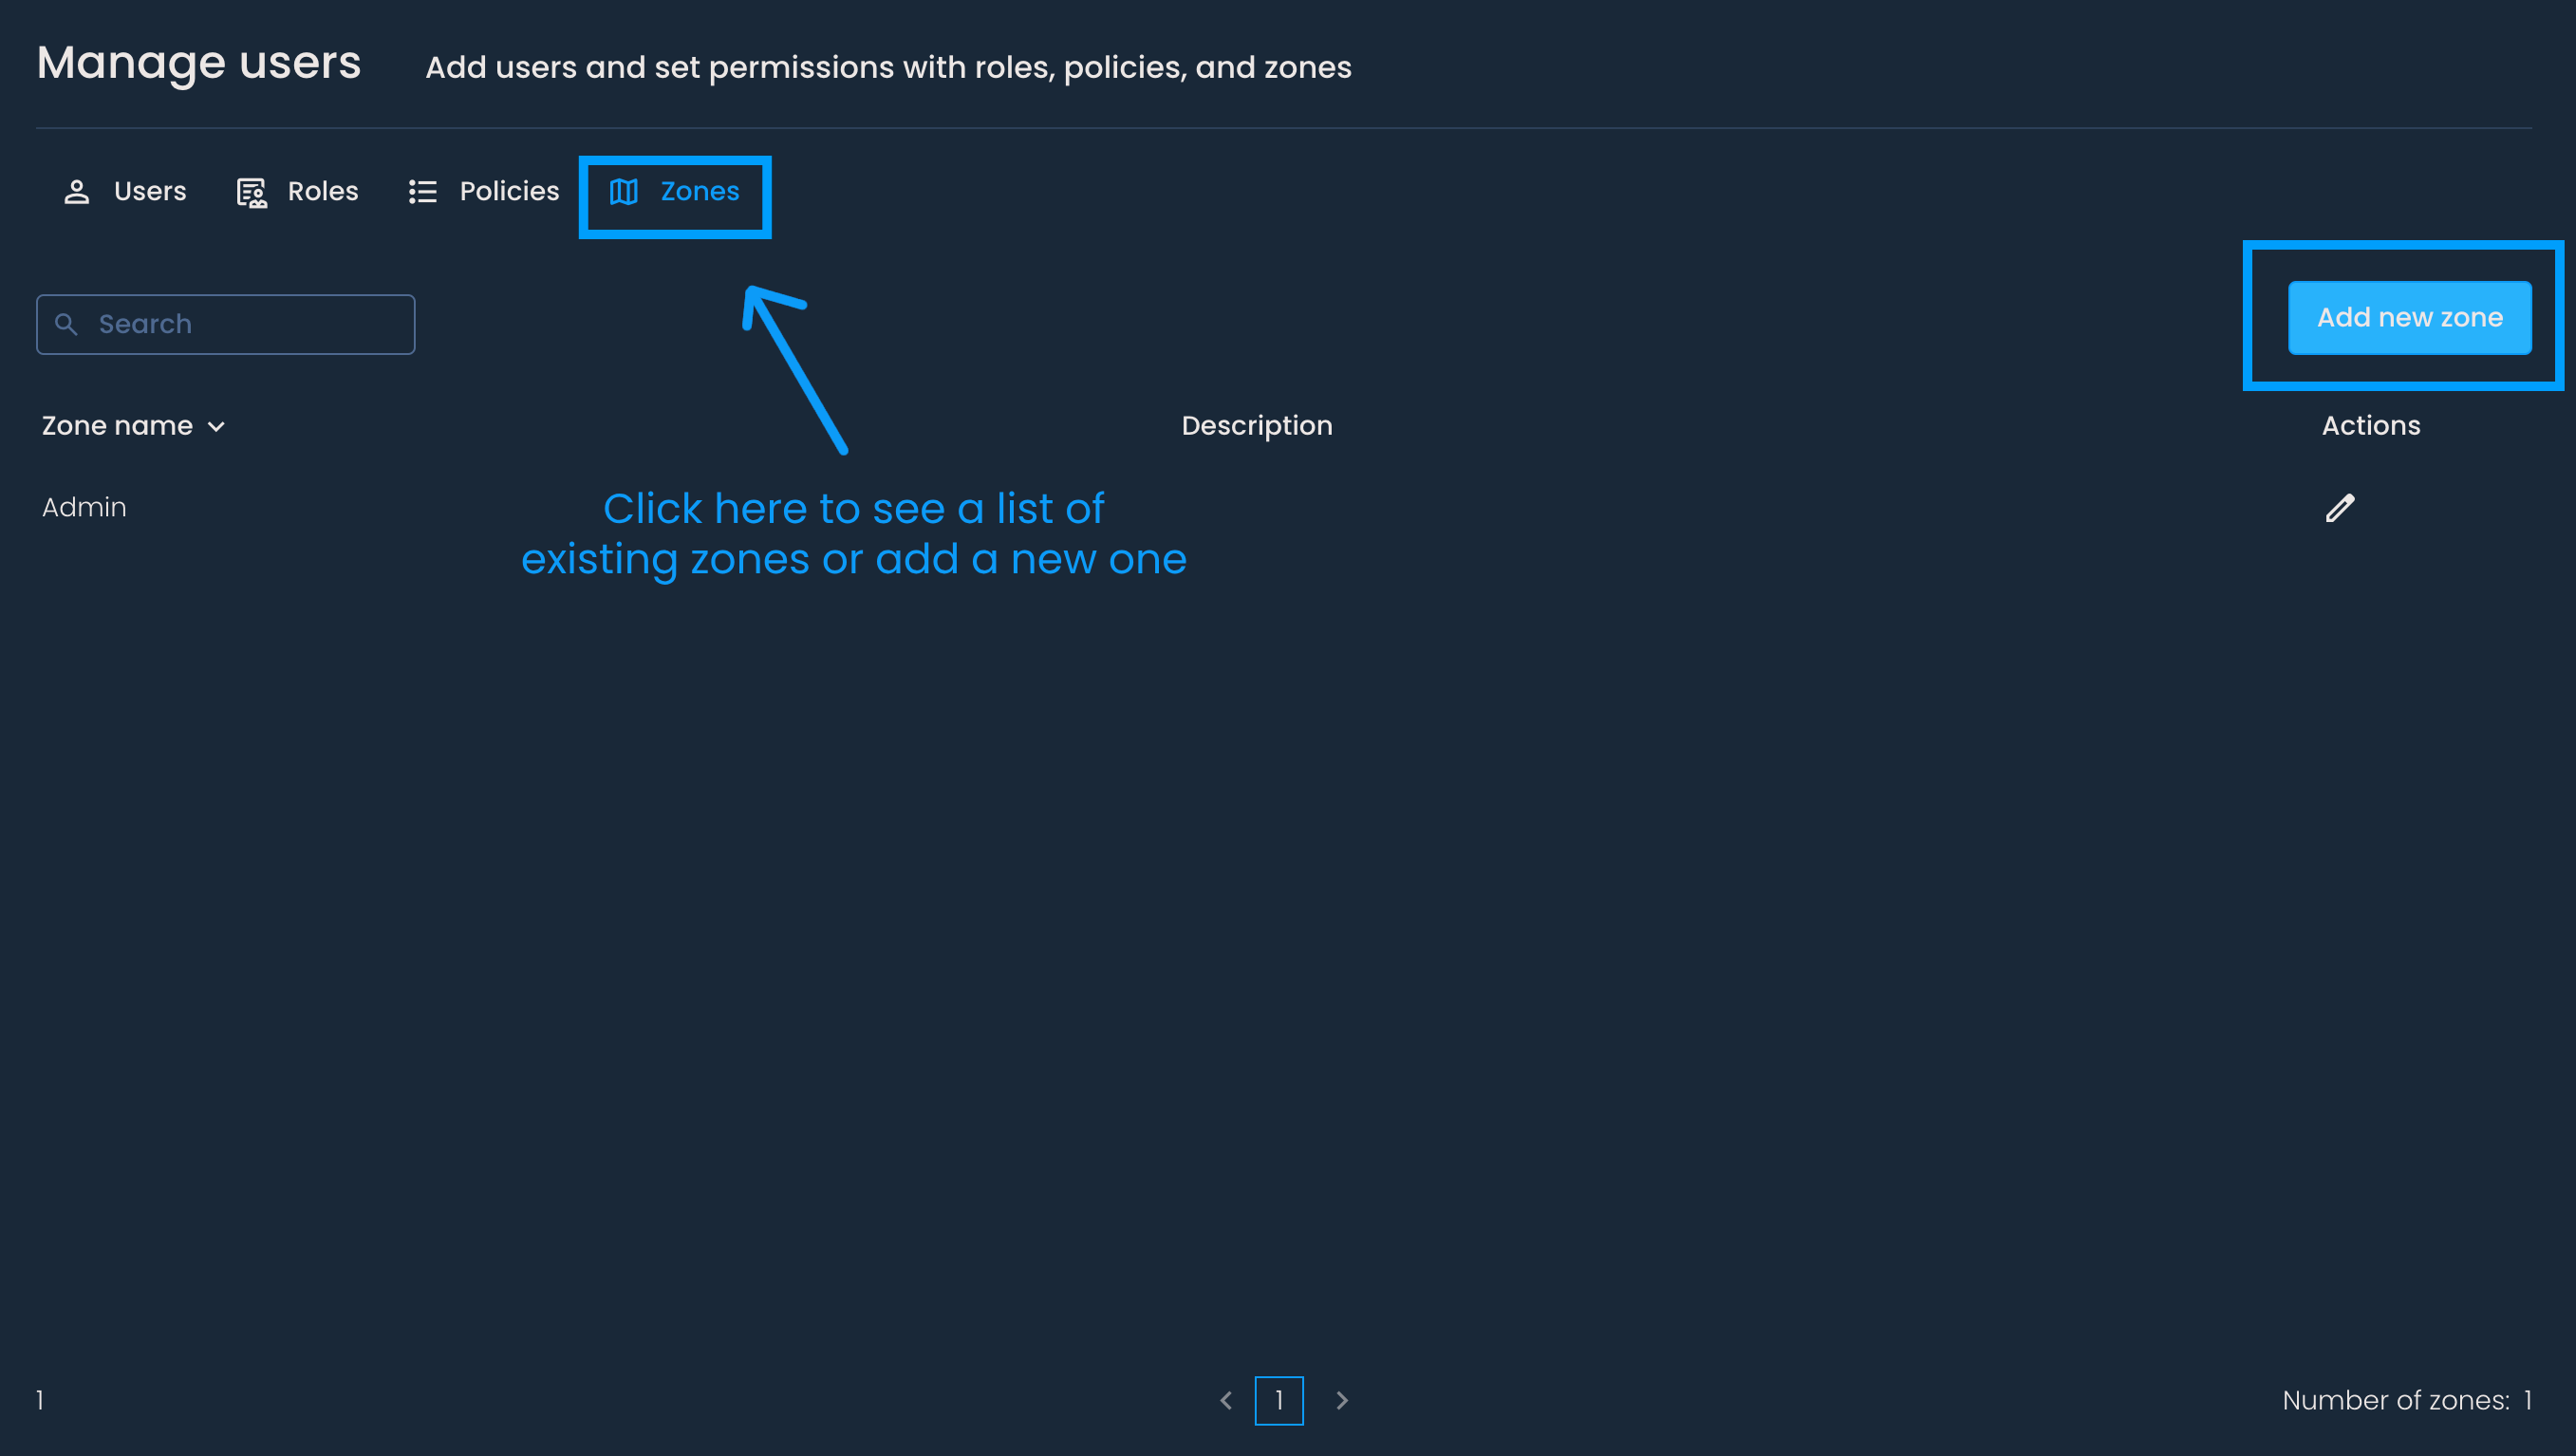
To create a new Zone, go to the Manage users page. Click the Zones tab and then the Add new zone button.
You can then name the new zone and optionally write a short description (e.g., zone including all delivery areas) and click Next.

Then, you can select delivery areas, teams, and hubs that belong to the zone. Choose the appropriate area, team, and hub from the drop-down menu, or type their name in each step. Finally, press Save.


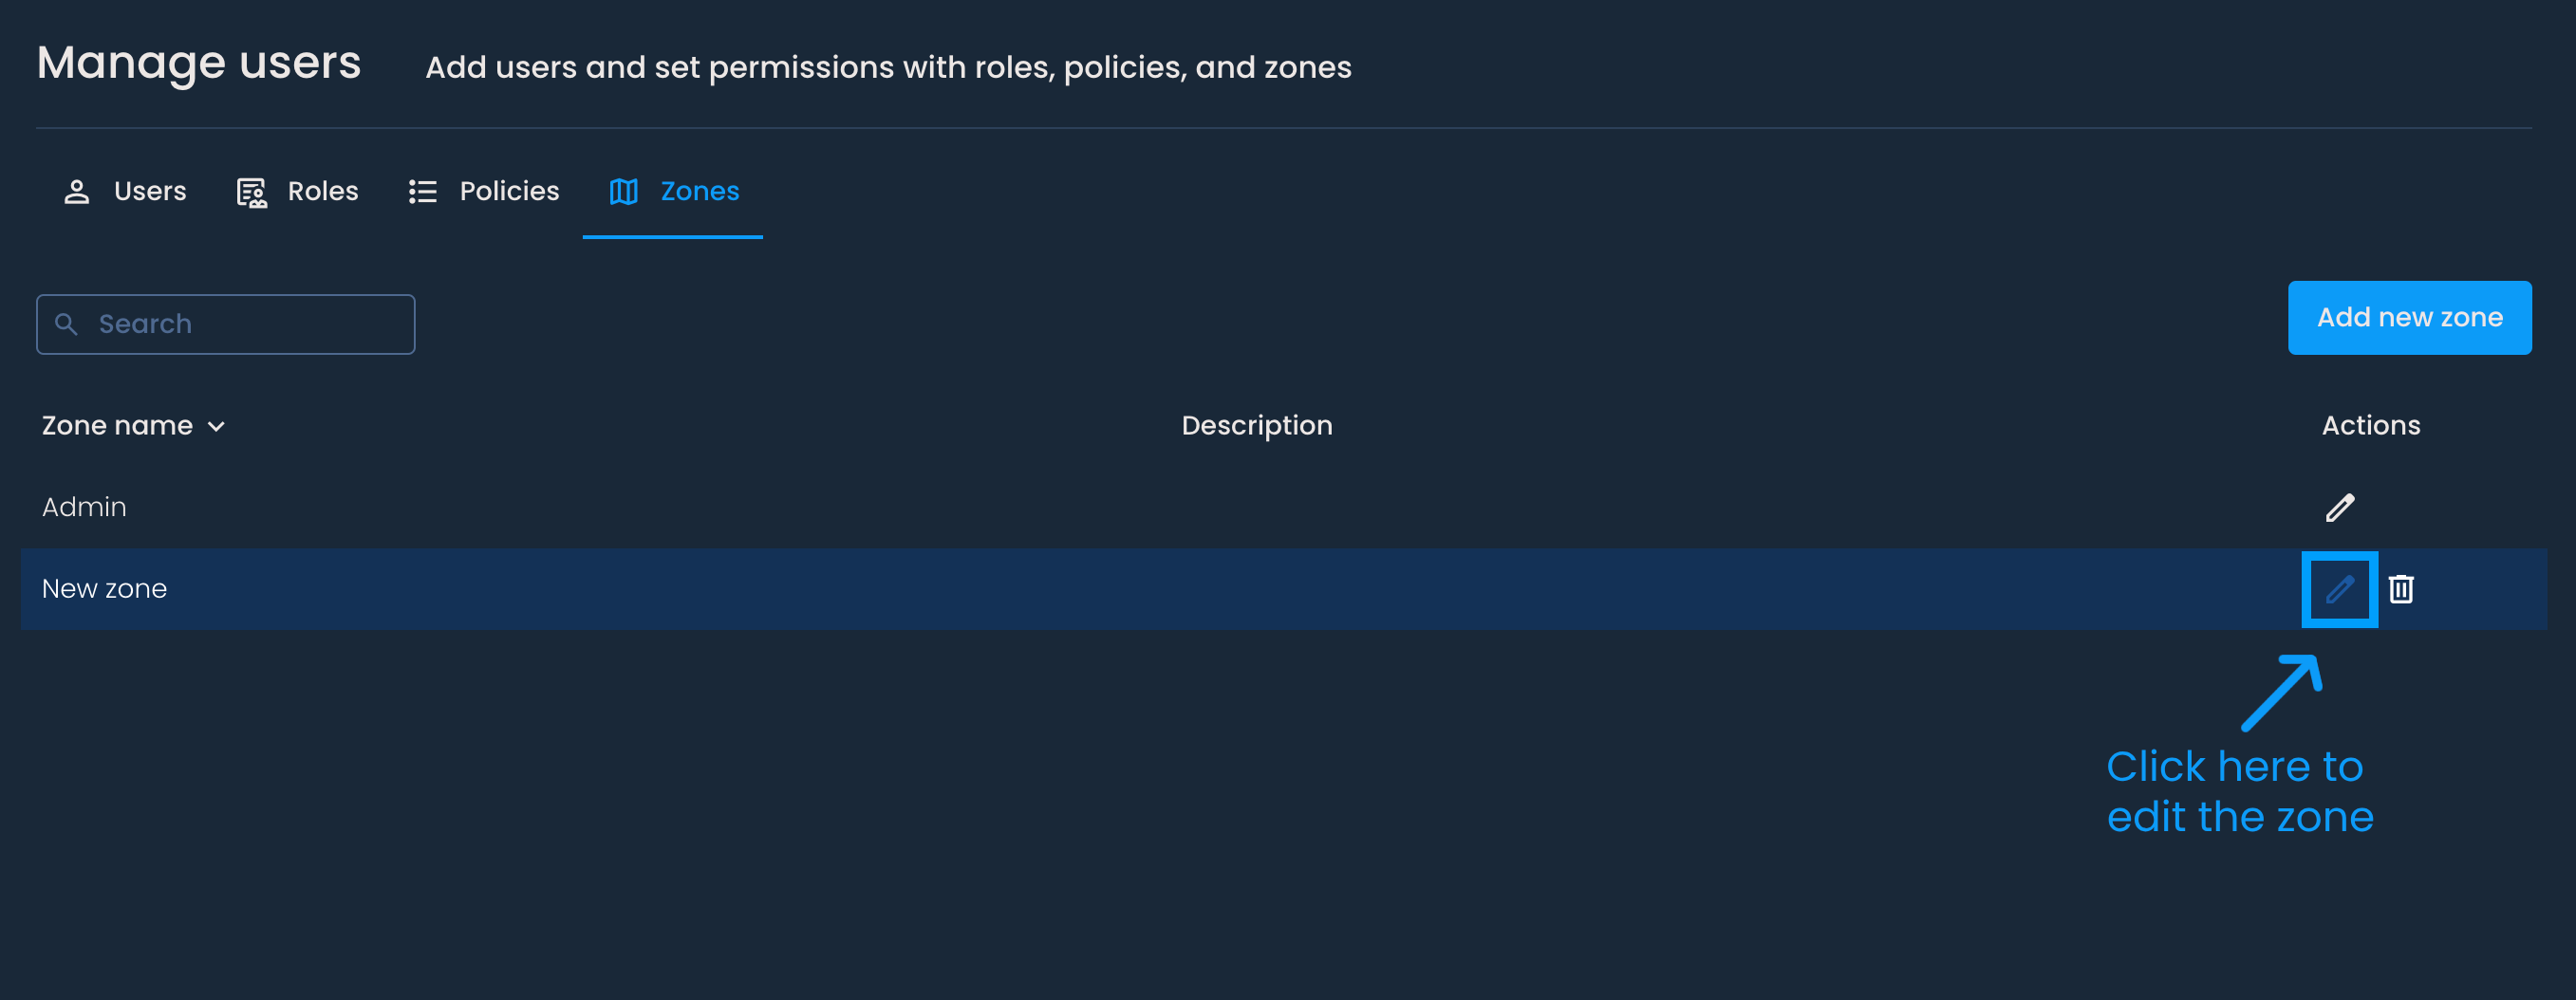
The newly created zone will be added to the list.
You can edit a zone by clicking the pencil icon in the Actions column next to its name. After making changes, be sure to press Save.
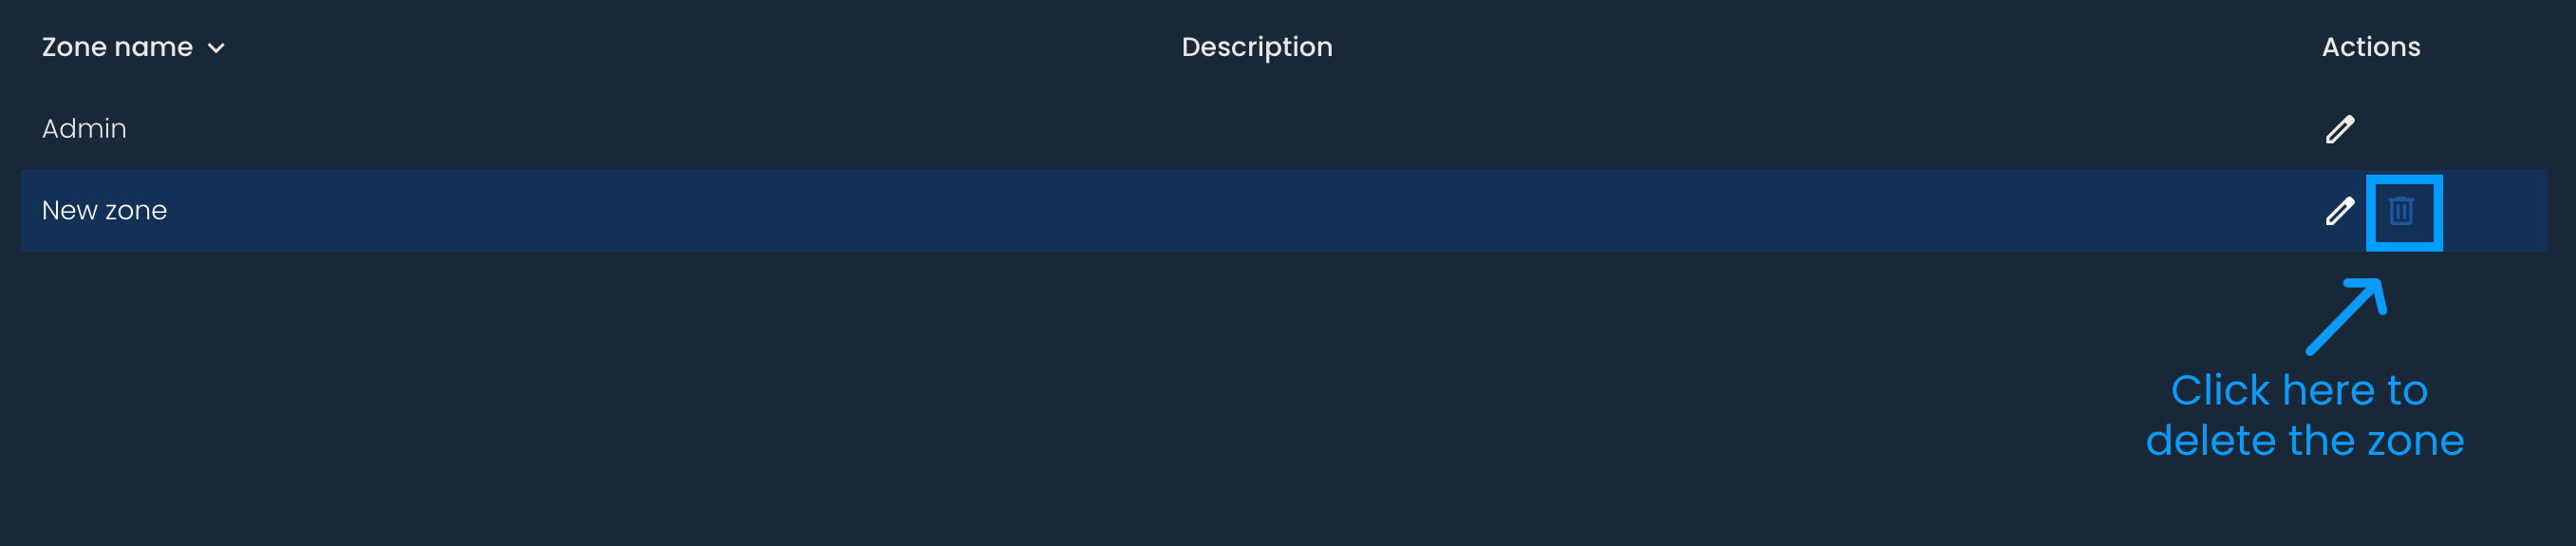
To delete a zone, click the bin icon in the Actions column and then press Delete. This action cannot be undone.
If a zone is assigned to a role, it cannot be deleted until the role is connected to a different zone. In that case, you'll receive a notification like the one below.