Distance pins help evaluate location potential.
You can add them:
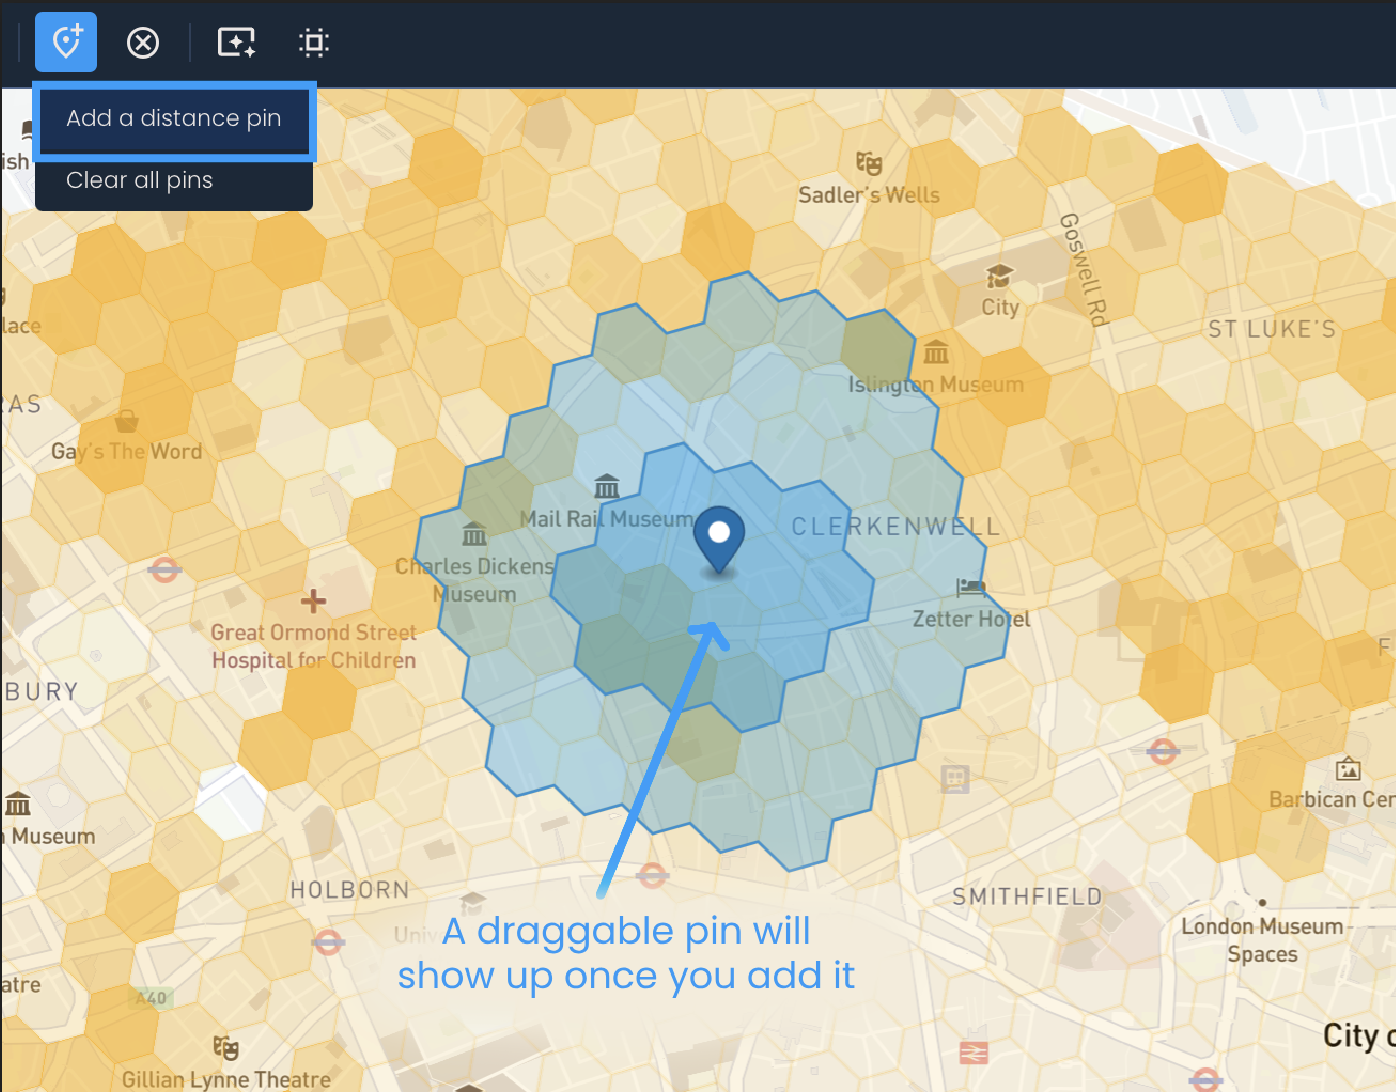
Manually: Click the Manage map pins button and then the Add a distance pin option. Then, drag the pin to a desired location. Repeat the process to add more pins.
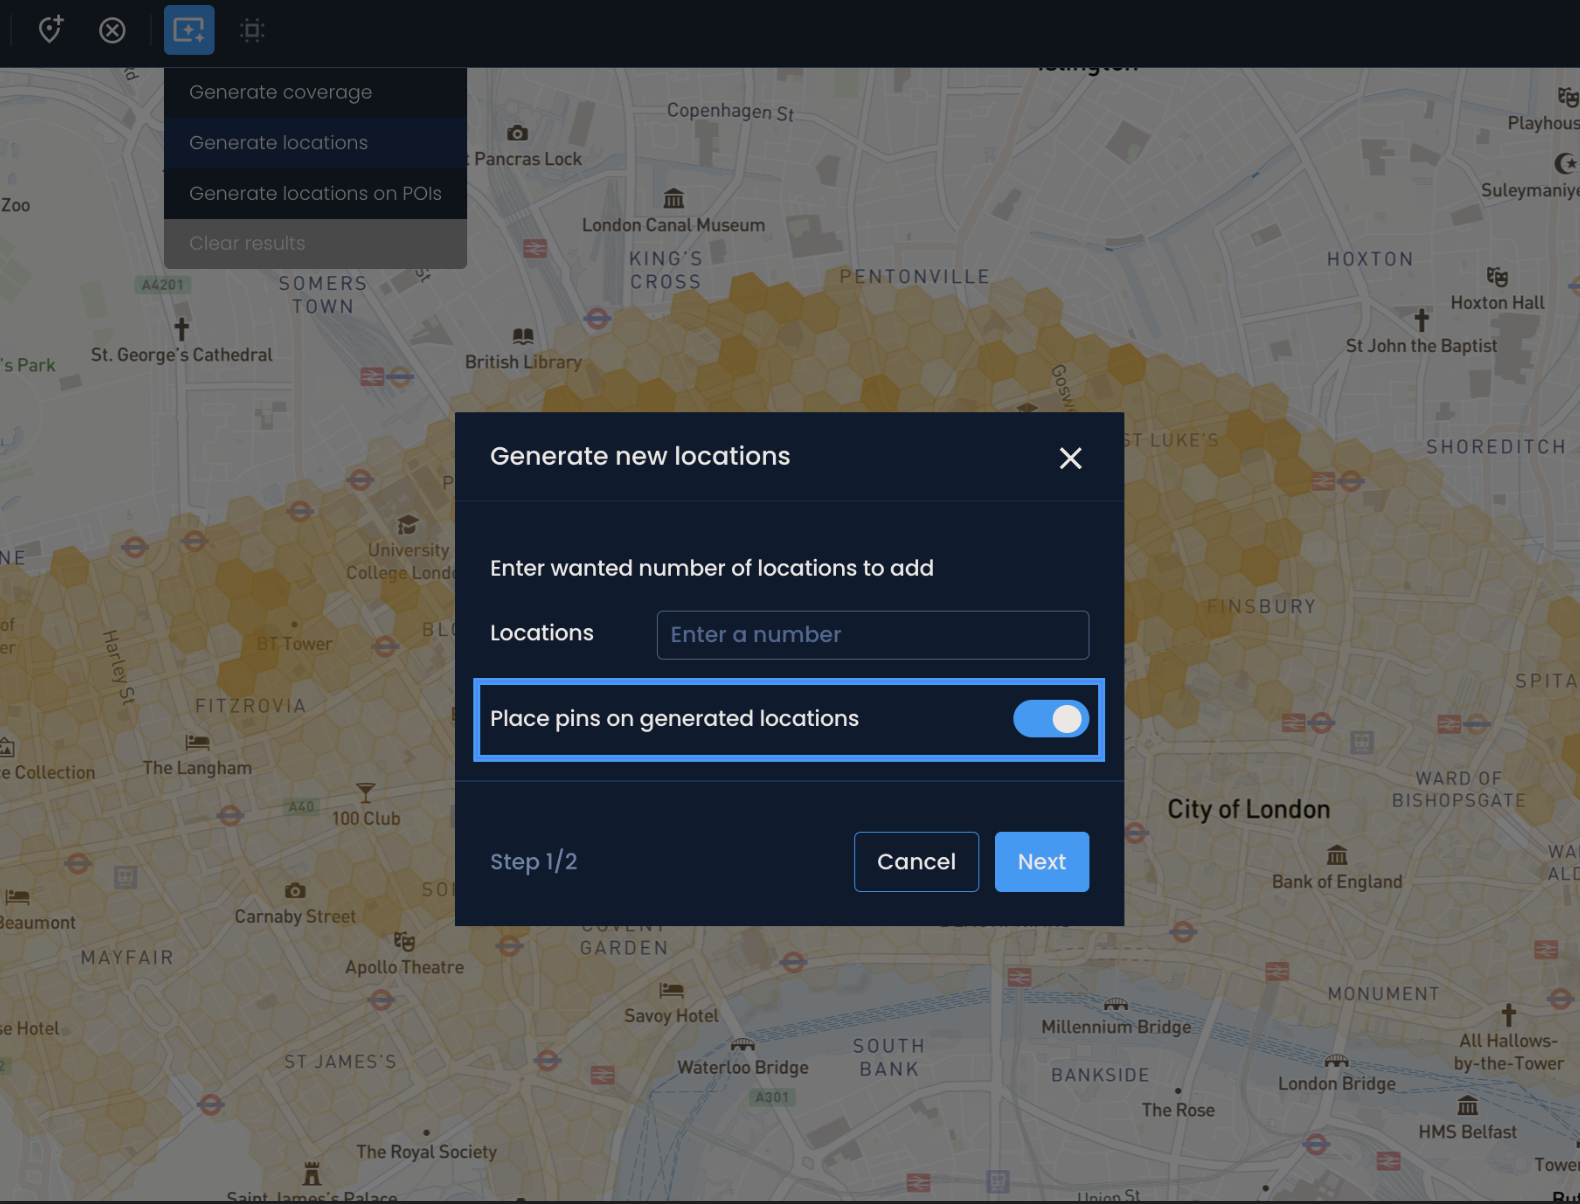
Automatically when generating location suggestions: By default, Pins are placed in the recommended areas when generating coverage, new locations, or POIs. You can turn this off in the first step of generating suggestions.
The estimated coverage will be recalculated each time a distance pin is added or moved to a new location.
You can remove individual pins by right-clicking them and then selecting Remove pin. To remove all pins at once, click the Manage map pins button again and select the Clear all pins option.


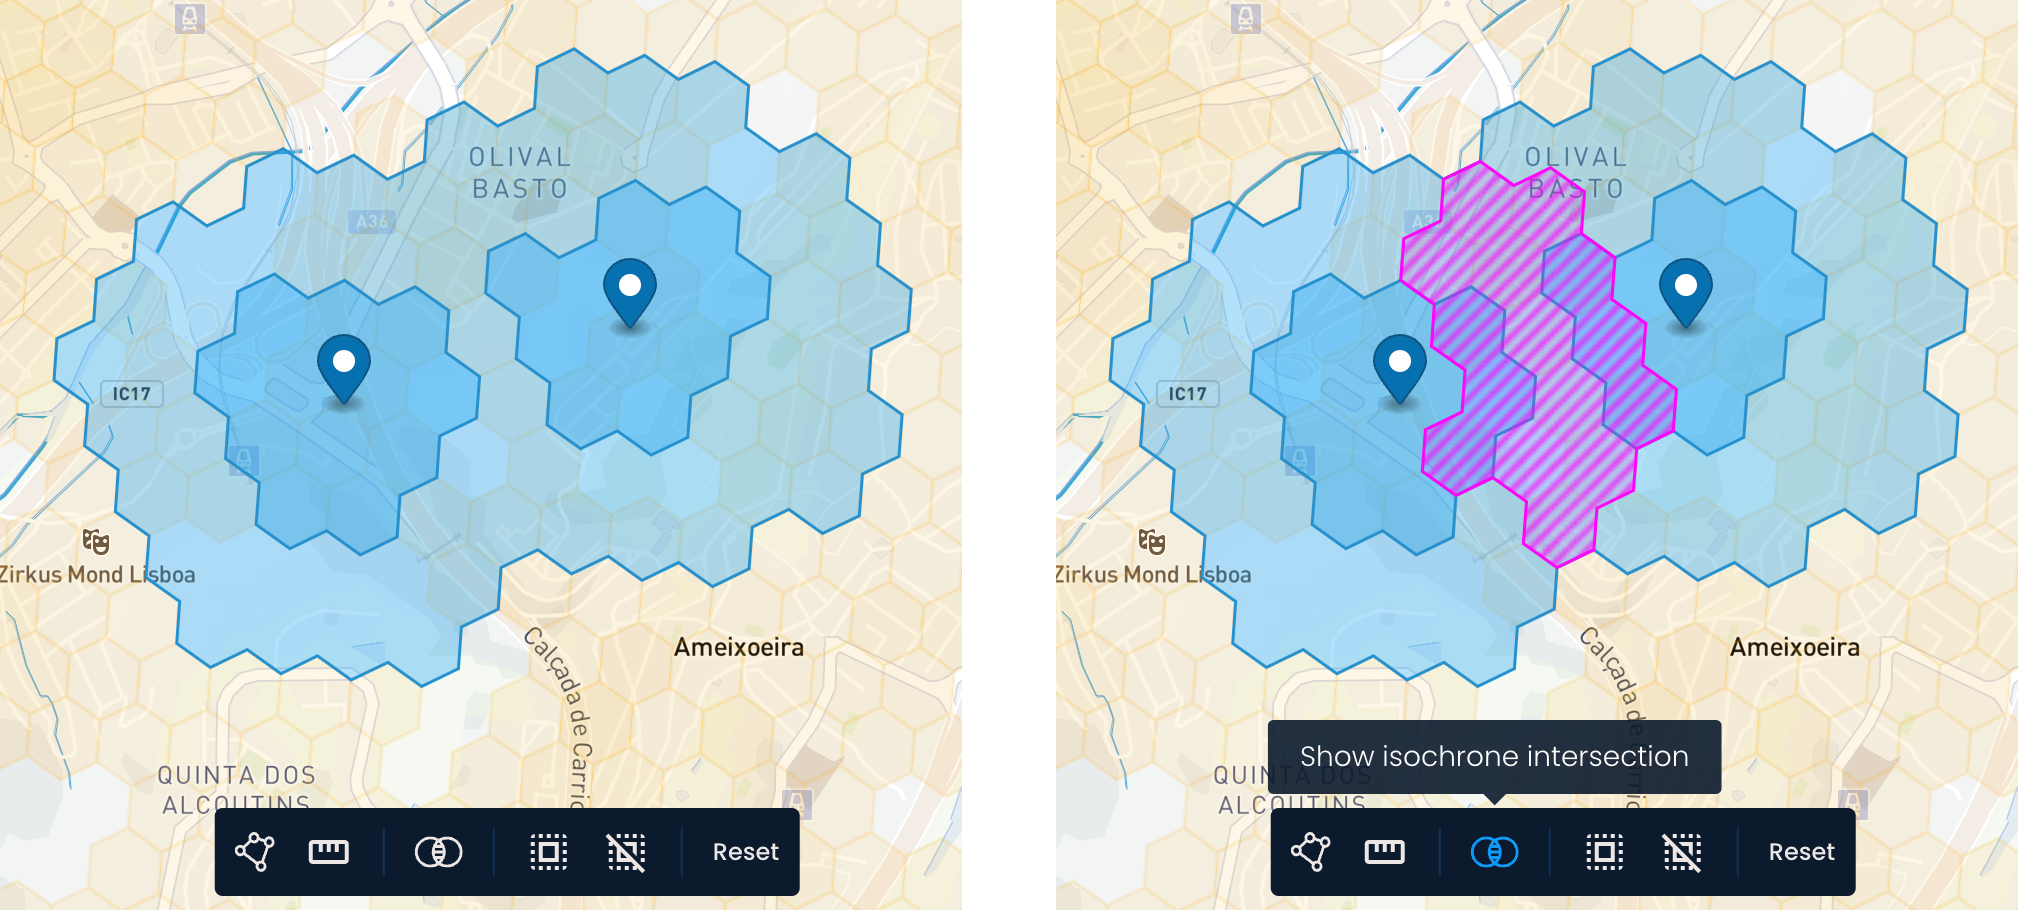
When two pins are placed close to each other, the isochrones—which represent the areas that can be reached within a certain distance from each pin—may overlap. Click the Show isochrone overlap button at the bottom toolbar to visualize this overlap. The intersection will be displayed as hatched hexagons in a different color.
You can rename the pin to keep track of specific locations.
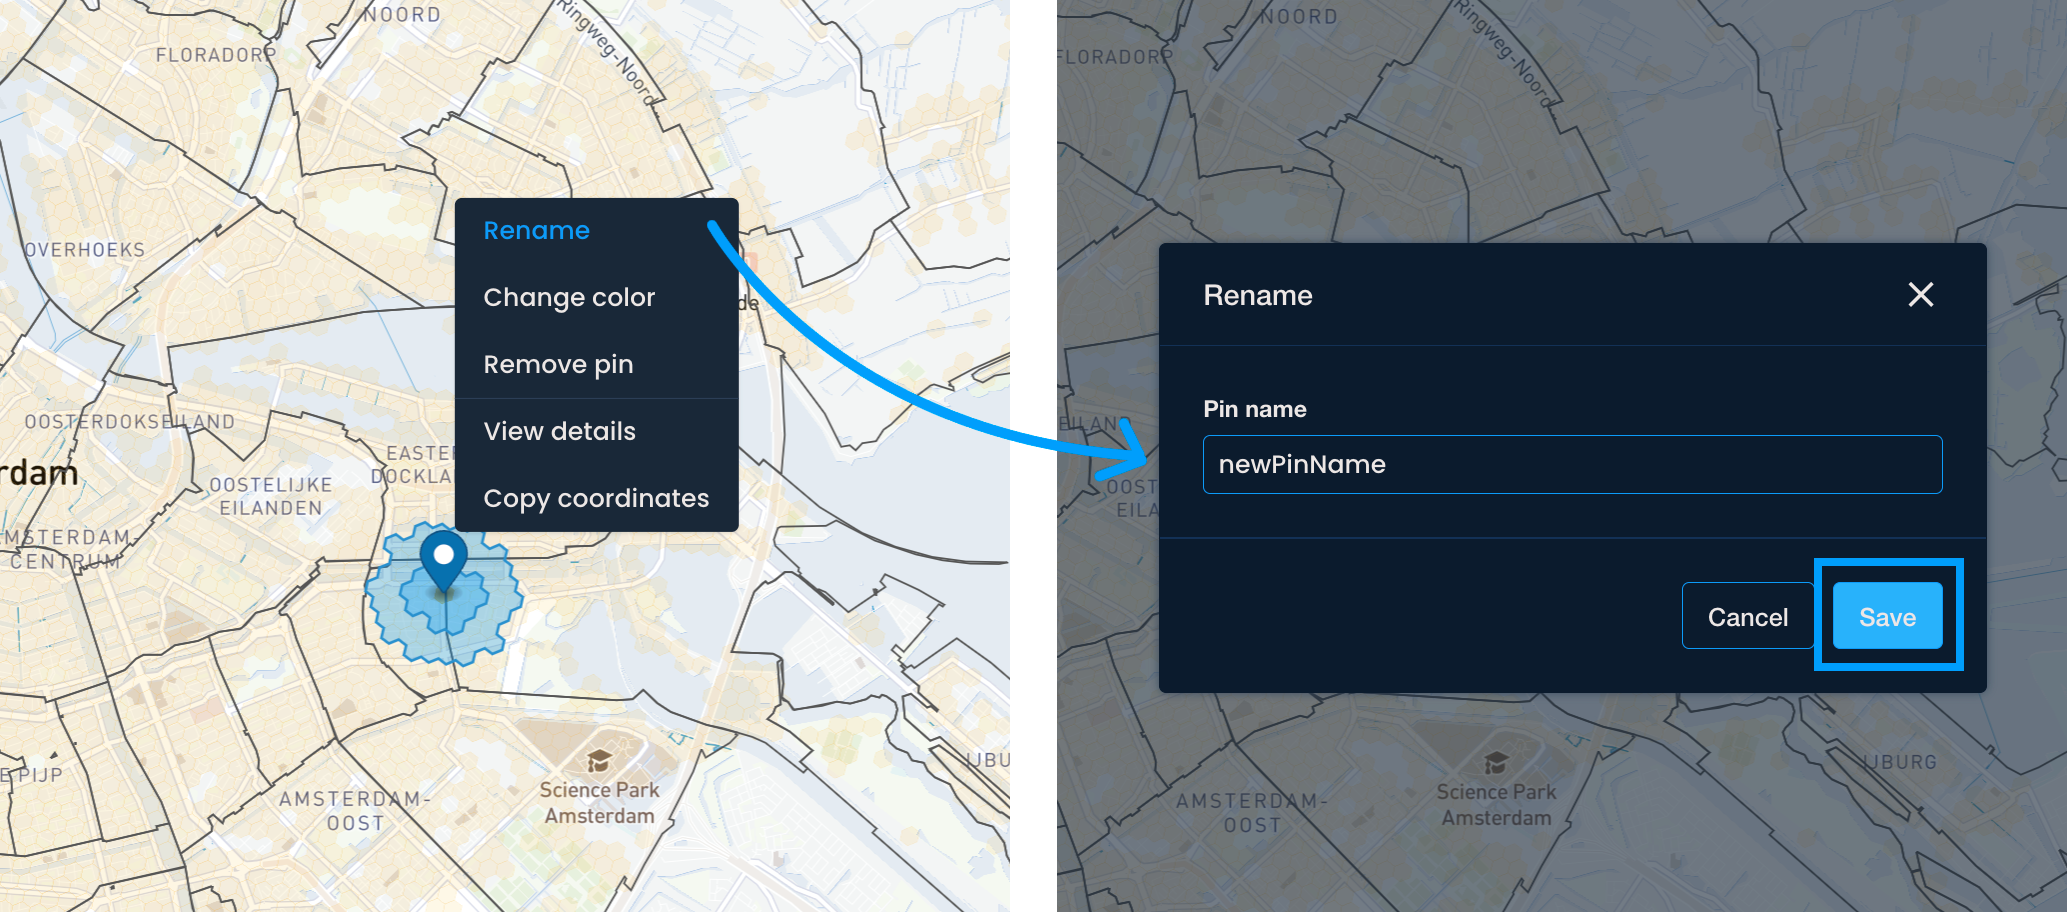
Right-click the pin and then select Rename.
Enter the desired name and click Save.
The new name will show up in the Selected locations menu and the exported analysis file.
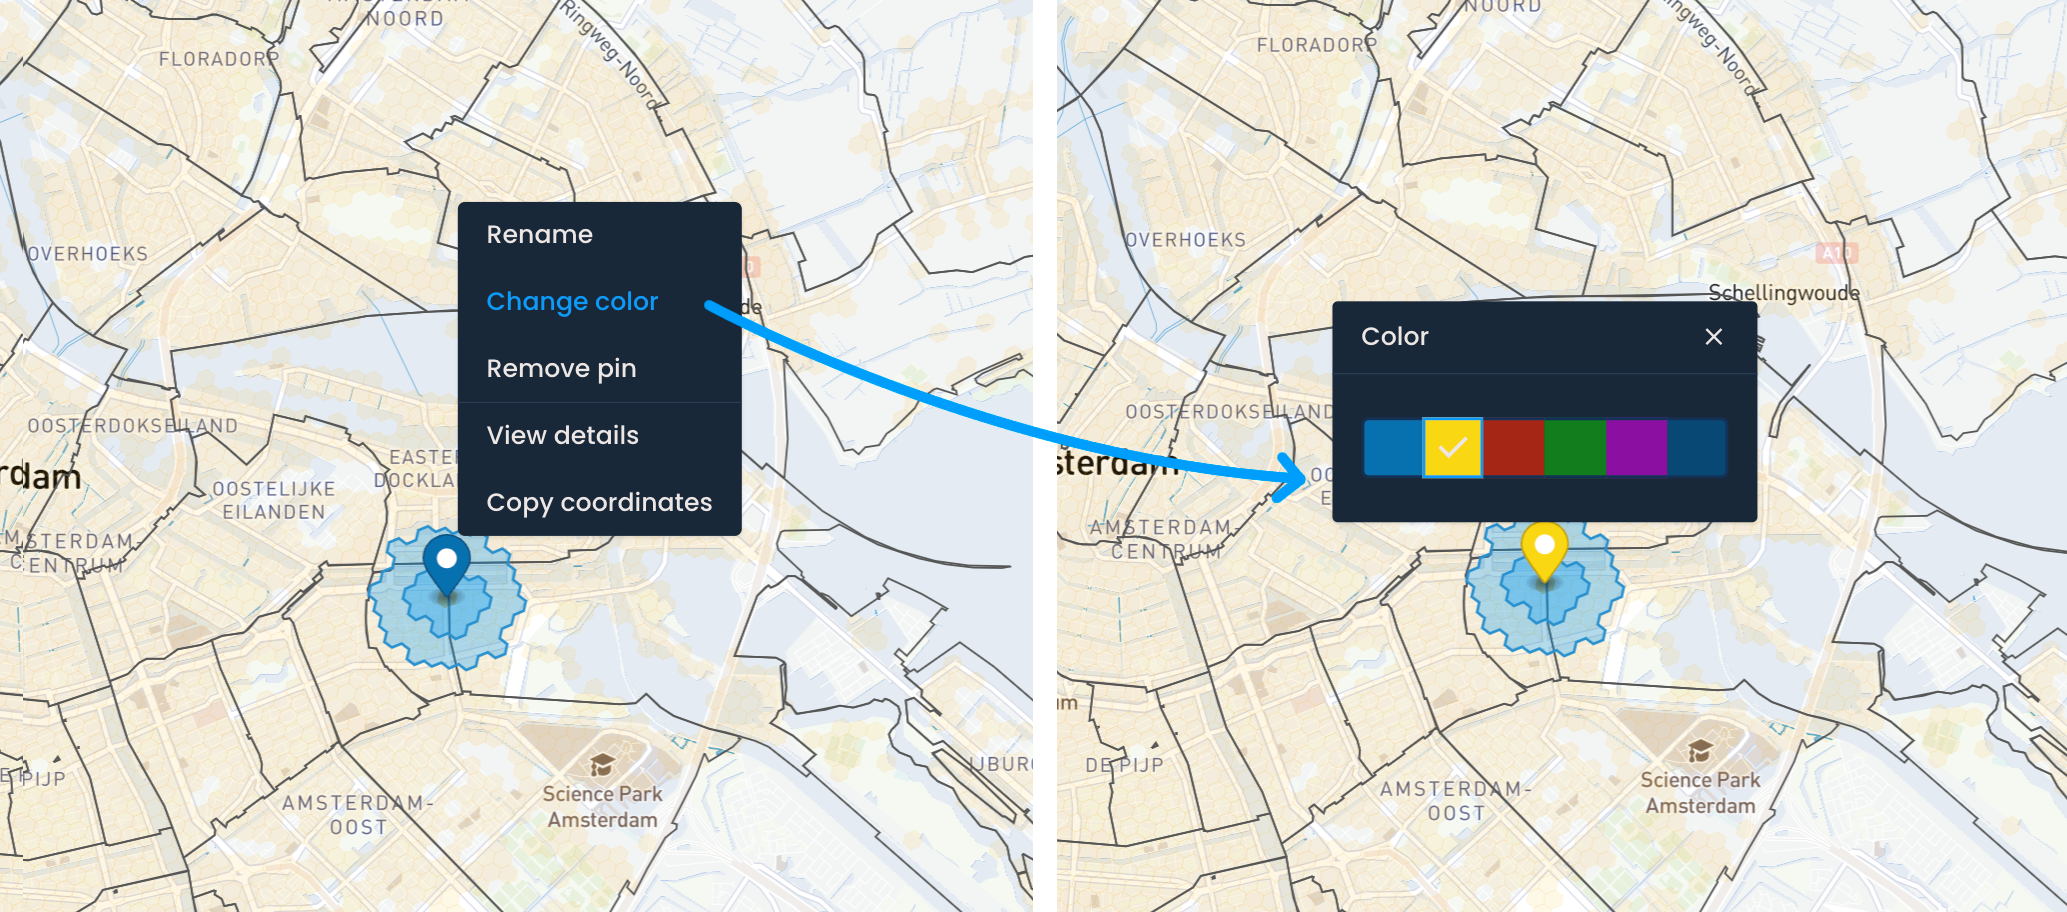
Changing the color of pins can help you keep track of location statuses and signal which locations you want to reject or explore further.
Right-click the pin and choose Change color.
Pick one of the available colors, and it will automatically be applied.
The color will also be shown in the exported analysis file.
Street View can help you explore locations virtually and validate them before making field visits.
Right-click the pin and choose View details.
In the Details menu, you will see the pin’s coverage and the Street View.
You can expand the Street View and explore in full-screen. Press ESC on your keyboard to exit.